The batching mechanism of Laravel Excel

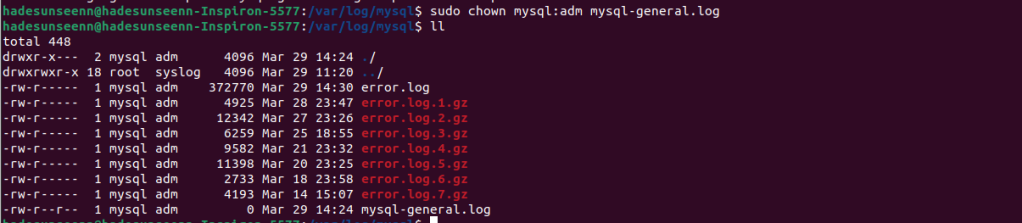
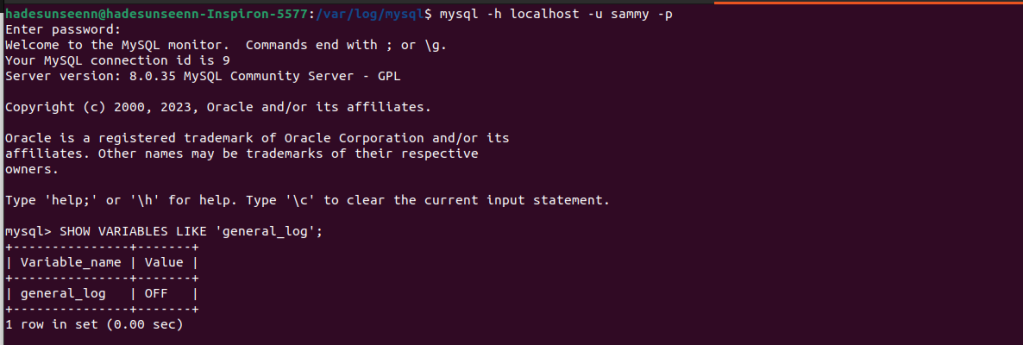
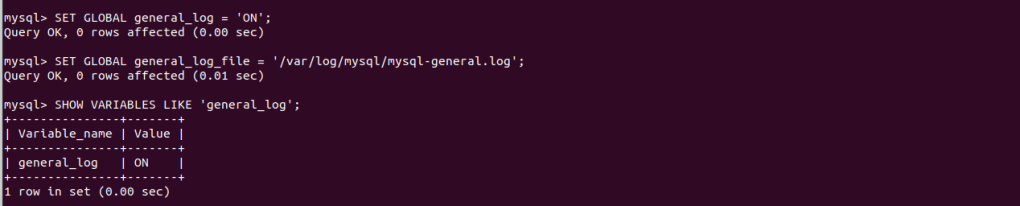
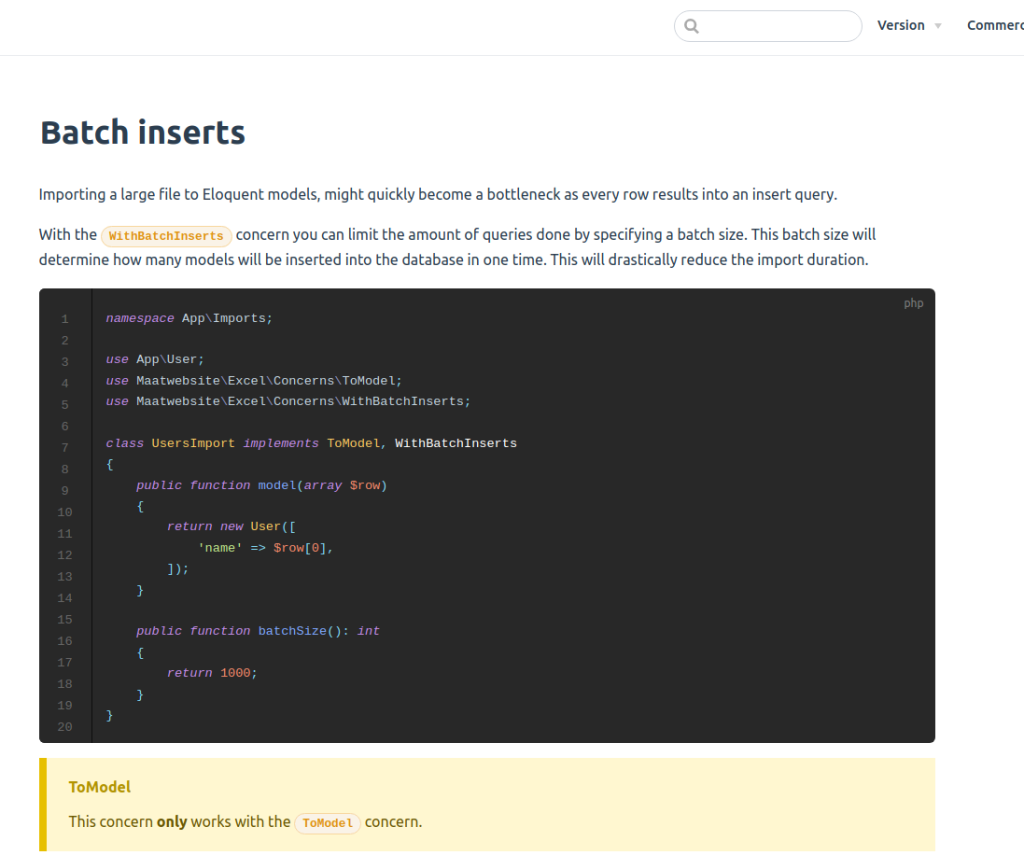
I’ve been using Laravel Excel for about a year now, and it’s been really helpful for importing large CSV files into my database. However, I wasn’t entirely sure how their batching feature works. So, I’ve been looking into it using the information I found in the MySQL log file. Here they explained how we can implement batching.

Used Laravel version 9 and Laravel Excel version 3.1

https://docs.laravel-excel.com/3.1/imports/batch-inserts.html

Initially, I assumed that if I have 10,000 records and my batch size is set to 1000, it would result in only 10 insert queries to the database. However, after examining the MySQL logs, I realized that this is not the case.


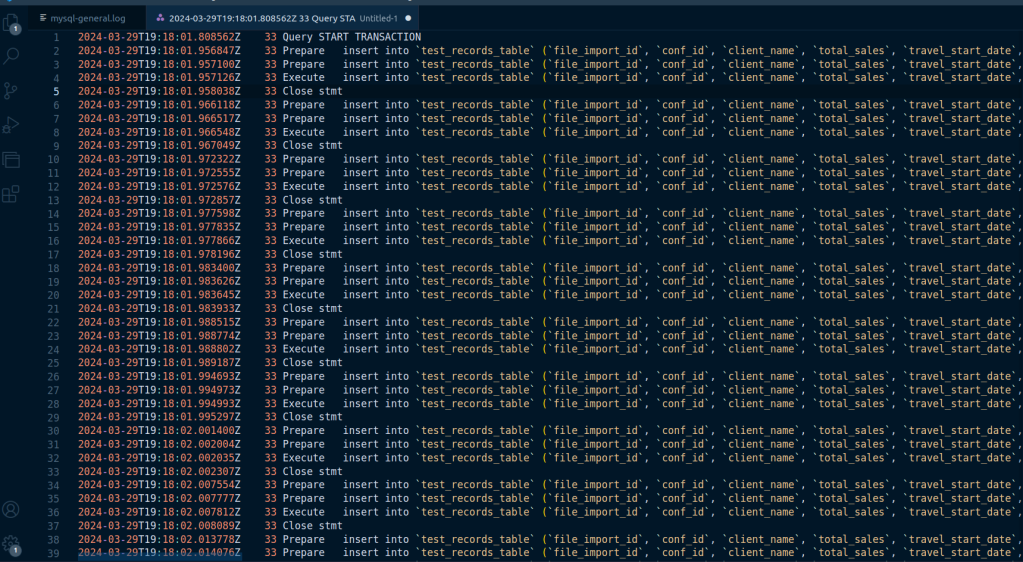
it is evident that each record from the dataset is being prepared and executed as an individual insert operation within a single transaction. This means that for each record, there’s a separate prepare and execute cycle, but all of these operations are encapsulated within a single transaction.

This behavior does not equate to batching in the sense of executing a single insert statement for multiple rows. Instead, each row is inserted individually, but the use of transactions likely helps in optimizing the process by ensuring that all inserts are either committed or rolled back together, which can improve performance and ensure data integrity.

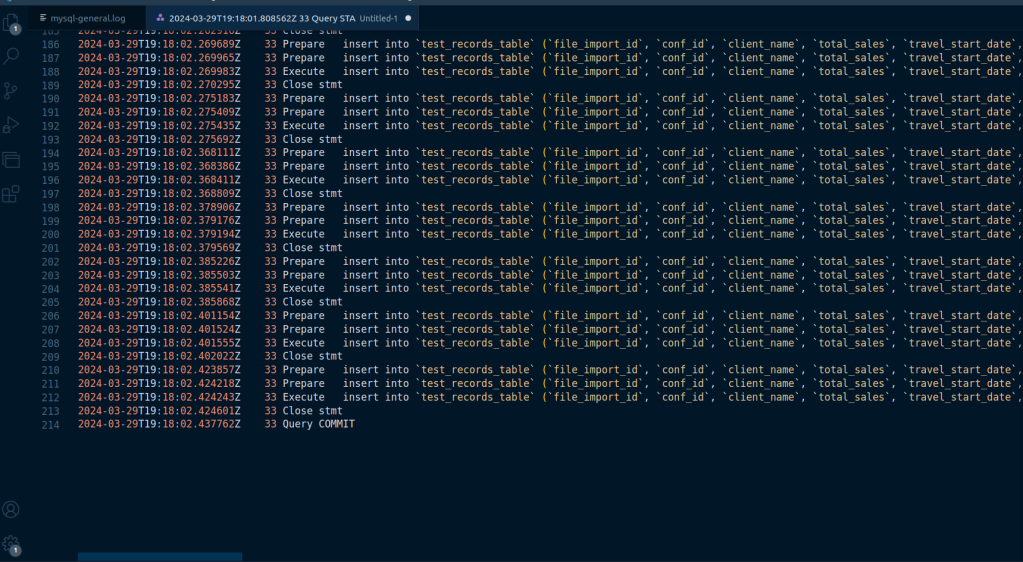
So, while there isn’t a single insert query for multiple rows, the package is using transactions to group multiple insert operations together, which is a form of batch processing but on the transaction level rather than the insert statement level. This approach ensures that the database is not committed for every single insert operation, which would be significantly less efficient.

Here’s what I’ve managed to figure out, but I might be mistaken. If any of you have experience with this package and have attempted to grasp its logic, please share your insights.

mySql Log queries to a file

Occasionally, when aiming to enhance database query performance, it’s necessary to examine the queries executed by the application on the database. Here’s a method for logging MySQL queries. The development environment, I am using is Ubuntu version 22.04 with MySQL version 8.0.35

There are several ways to do it but we are following a quick and easy way to enable it. A more complex way is to update the configuration file or create a custom configuration file.

First, we need to create the log file for MySQL

cd /var/log/mysql/
sudo touch mysql-general.log

Now we need to make sure that MySQL has access to write this file. Ownership by default when we created this file

The ownership is root root, but we can see the ownership of previous files is mysql adm. Let’s change ownership

sudo chown mysql:adm mysql-general.log

Now we have a log file in place, let’s try to enable the logs now.
Login into MySQL CLI and let’s see the value of general_log

Now let’s run these 2 command

SET GLOBAL general_log = 'ON';
SET GLOBAL general_log_file = '/var/log/mysql/mysql-general.log';

If everything goes well you will see general_log value ON. If some issue with log file ownership or permission MySQL may throw an error like this

WordPress get posts for Custom post and Custom Taxonomy

Here we are getting posts for a custom post type hp_listing, custom taxonomy hp_listing_region and the taxonomy term boston

when we open posts you can get post_type from URL
wp-admin/edit.php?post_type=hp_listing

then to get the taxonomy open the taxonomy page
wp-admin/edit-tags.php?taxonomy=hp_listing_region&post_type=hp_listing

<?php
$args = array(
    'post_type' => 'hp_listing', // your custom post type
    'posts_per_page' => 10, // the number of posts to retrieve
    'tax_query' => array(
        array(
            'taxonomy' => 'hp_listing_region', // your custom taxonomy
            'field'    => 'slug',
            'terms'    => 'boston', // replace with your category slug
        ),
    ),
);

$query = new WP_Query($args);

if ($query->have_posts()) : 
    while ($query->have_posts()) : $query->the_post();
        // Output the title and content of each post
        the_title('<h2>', '</h2>');
        the_content();
    endwhile;
    wp_reset_postdata();
else : 
    echo '<p>No posts found for this category.</p>';
endif;

?>

Microsoft project keyboard shortcut to edit the task name

In Microsoft Project, to edit a task name using keyboard shortcuts, you typically need to first select the task you want to edit. Once the task is selected, you can press F2. This shortcut key puts the task name in edit mode, allowing you to change the task name directly in the table cell where the task name is displayed. After pressing F2, simply type the new name for your task and press Enter to apply the changes.

Ubuntu remove restrictions from a PDF

qpdf is a command-line program that can convert PDF files from one version to another, or remove restrictions. It does not, however, remove DRM. First, you need to install qpdf if it’s not already installed:

sudo apt update
sudo apt install qpdf

To remove restrictions from a PDF file, run the following command:

qpdf --decrypt input.pdf output.pdf

Replace input.pdf with the name of your PDF file and output.pdf with the name of the new unrestricted file.

nvm list node versions and use version

List Versions

nvm ls
->     v14.21.3
v18.16.1
system
default -> 14 (-> v14.21.3)
iojs -> N/A (default)
unstable -> N/A (default)
node -> stable (-> v18.16.1) (default)
stable -> 18.16 (-> v18.16.1) (default)
lts/* -> lts/hydrogen (-> v18.16.1)
lts/argon -> v4.9.1 (-> N/A)
lts/boron -> v6.17.1 (-> N/A)
lts/carbon -> v8.17.0 (-> N/A)
lts/dubnium -> v10.24.1 (-> N/A)
lts/erbium -> v12.22.12 (-> N/A)
lts/fermium -> v14.21.3
lts/gallium -> v16.20.1 (-> N/A)
lts/hydrogen -> v18.16.1

Use version – From the available list we can select any version

nvm use 18.16.1

Heroku command

1.List all apps

    heroku apps

    2. set remote

    heroku git:remote -a heroku-app-name
    If we don't set the remote then we won't be able to run heroku ps:scale web=1

    3. Check all env varibale for the app

    heroku config

    4. Scale the dyno to standard-2x

    heroku ps:scale web=2:standard-2x

    5. Login heroku CLI

    heroku login